Konfigurasi LAMP, Klik Disini
Download Source Code Heimdall Disini
Extract dan pindahkan kedalam direktori yang di inginkan
mv heimdall/ /var/wwwDisini saya akan membuat virtualhost dengan port yang berbeda dengan default. saya mengunakan port 999 dengan menyalin terlebih dahulu konfigurasi default apache
cp /etc/apache2/sites-available/000-default.conf /etc/apache2/sites-available/heimdall.confEdit file konfigurasi
nano /etc/apache2/sites-available/heimdall.confUbah menjadi port sesuai keinginan
Listen 9999

<VirtualHost *:9999>
        # The ServerName directive sets the request scheme, hostname and port that
        # the server uses to identify itself. This is used when creating
        # redirection URLs. In the context of virtual hosts, the ServerName
        # specifies what hostname must appear in the request's Host: header to
        # match this virtual host. For the default virtual host (this file) this
        # value is not decisive as it is used as a last resort host regardless.
        # However, you must set it for any further virtual host explicitly.
        #ServerName www.example.com

        ServerAdmin webmaster@localhost
        DocumentRoot /var/www/heimdall/public

        <Directory /var/www/heimdall/public>
        Options Indexes FollowSymLinks MultiViews
        AllowOverride All
        Require all granted
    </Directory>

        # Available loglevels: trace8, ..., trace1, debug, info, notice, warn,
        # error, crit, alert, emerg.
        # It is also possible to configure the loglevel for particular
        # modules, e.g.
        #LogLevel info ssl:warn

        ErrorLog ${APACHE_LOG_DIR}/error.log
        CustomLog ${APACHE_LOG_DIR}/access.log combined

        # For most configuration files from conf-available/, which are
        # enabled or disabled at a global level, it is possible to
        # include a line for only one particular virtual host. For example the
        # following line enables the CGI configuration for this host only
        # after it has been globally disabled with "a2disconf".
        #Include conf-available/serve-cgi-bin.conf
</VirtualHost>

# vim: syntax=apache ts=4 sw=4 sts=4 sr noet
Save, Lalu aktifkan dengan mengetikkan perintah
a2ensite heimdall.confReload Apache
systemctl reload apache2*Tambahan saja: Lakukan akses pengujian dengan mengakses menggunakan port yang telah ditentukan
Buat Database
mysql -u user -pPasswordMariaDB [(none)]> create database heimdall;MariaDB [(none)]> create user 'userdb'@'localhost' identified by 'passworddb';MariaDB [(none)]> grant all privileges on heimdall.* to 'userdb'@'localhost';MariaDB [(none)]> flush privileges;MariaDB [(none)]> quit;Konfigurasi Heimdall
Pergi ke direktori heimdall
cd /var/www/heimdallSalin file .env.example
cp .env.example .envEdit
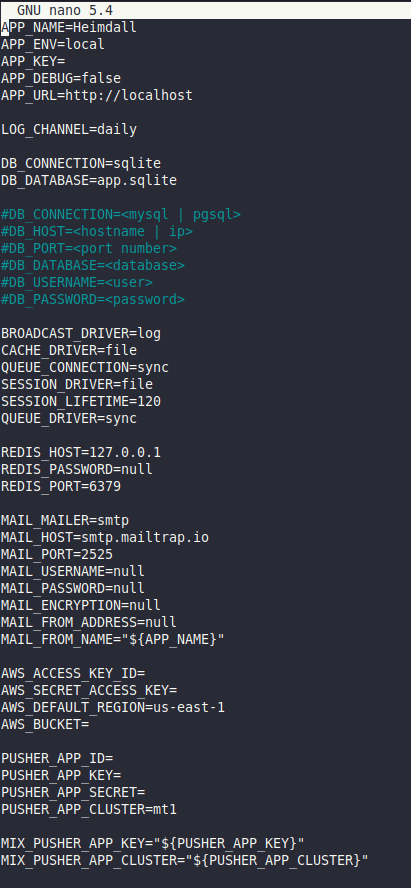
nano .env
Edit sesuai dengan database yang telah dibuat diatas, sehingga menjadi seperti berikut:
APP_NAME=Heimdall
APP_ENV=local
APP_KEY=
APP_DEBUG=false
APP_URL=http://localhost

LOG_CHANNEL=daily

DB_CONNECTION=sqlite
DB_DATABASE=app.sqlite

DB_CONNECTION=mysql
DB_HOST=localhost
DB_PORT=3306
DB_DATABASE=heimdall
DB_USERNAME=userdb
DB_PASSWORD=passworddb

BROADCAST_DRIVER=log
CACHE_DRIVER=file
QUEUE_CONNECTION=sync
SESSION_DRIVER=file
SESSION_LIFETIME=120
QUEUE_DRIVER=sync

REDIS_HOST=127.0.0.1
REDIS_PASSWORD=null
REDIS_PORT=6379

MAIL_MAILER=smtp
MAIL_HOST=smtp.mailtrap.io
MAIL_PORT=2525
MAIL_USERNAME=null
MAIL_PASSWORD=null
MAIL_ENCRYPTION=null
MAIL_FROM_ADDRESS=null
MAIL_FROM_NAME="${APP_NAME}"

AWS_ACCESS_KEY_ID=
AWS_SECRET_ACCESS_KEY=
AWS_DEFAULT_REGION=us-east-1
AWS_BUCKET=

PUSHER_APP_ID=
PUSHER_APP_KEY=
PUSHER_APP_SECRET=
PUSHER_APP_CLUSTER=mt1

MIX_PUSHER_APP_KEY="${PUSHER_APP_KEY}"
MIX_PUSHER_APP_CLUSTER="${PUSHER_APP_CLUSTER}"
Generate PHP artisan
php /var/www/heimdall/artisan key:generateUbah kepemilikan
chown -R www-data:www-data /var/www/heimdall/Ubah izin
chmod -R 775 /var/www/heimdall/Restart Apache
systemctl restart apache2Keterangan artikel:
Sumber/referensi:
https://github.com/linuxserver/Heimdall

https://www.kreaweb.be/diy-home-server-software-heimdall/

