=== KETERANGAN ===
Instalasi LEMP Stack (Nginx, MariaDB, PHP)
Update & upgrade
sudo apt update && sudo apt upgrade -yInstall Nginx
sudo apt install nginxPastikan layanan nginx sudah aktif dan berjalan dengan baik
sudo systemctl status nginxSetelah diinstal, kita dapat mengaktifkan Nginx untuk memulai secara otomatis saat boot dengan menjalankan perintah berikut.
sudo systemctl enable nginxMulai layanan nginx
sudo systemctl start nginxCek status layanan nginx
sudo systemctl status nginxCek menggunakan web browser apakah web server sudah berjalan dengan baik atau belum
Jika koneksi refused atau gagal cek firewall (ufw, iptables, dll)
Install MariaDB
sudo apt install mariadb-server mariadb-clientCek status MariaDB
sudo systemctl status mariadbJalankan Instalasi secure
sudo mysql_secure_installationJika muncul pertanyaan
NOTE: RUNNING ALL PARTS OF THIS SCRIPT IS RECOMMENDED FOR ALL MariaDB
      SERVERS IN PRODUCTION USE!  PLEASE READ EACH STEP CAREFULLY!

In order to log into MariaDB to secure it, we'll need the current
password for the root user.  If you've just installed MariaDB, and
you haven't set the root password yet, the password will be blank,
so you should just press enter here.

Enter current password for root (enter for none):
Tekan enter
Jika muncul pertanyaan
Setting the root password ensures that nobody can log into the MariaDB
root user without the proper authorisation.

Set root password? [Y/n] y
Jawab Y enter, lalu masukkan password root mysql baru
Jika muncul pertanyaan
By default, a MariaDB installation has an anonymous user, allowing anyone
to log into MariaDB without having to have a user account created for
them.  This is intended only for testing, and to make the installation
go a bit smoother.  You should remove them before moving into a
production environment.

Remove anonymous users? [Y/n] y
Jawab Y
Jika muncul pertanyaan
Remove anonymous users? [Y/n] yJawab Y
Jika muncul pertanyaan
Normally, root should only be allowed to connect from 'localhost'.  This
ensures that someone cannot guess at the root password from the network.

Disallow root login remotely? [Y/n] y
Jawab Y
Jika muncul pertanyaan
By default, MariaDB comes with a database named 'test' that anyone can
access.  This is also intended only for testing, and should be removed
before moving into a production environment.

Remove test database and access to it? [Y/n] y
Jawab Y
Jika muncul pertanyaan
Reloading the privilege tables will ensure that all changes made so far
will take effect immediately.

Reload privilege tables now? [Y/n] y
Jawab Y
Coba masuk menggunakan password root baru yang baru saja dibuat
mysql -u root -pLalu masukkan password
Download invoice ninja zip installer
wget https://github.com/invoiceninja/invoiceninja/releases/download/v5.4.9/invoiceninja.zipInstall unzip dan extrack kedalam direktori /var/www/invoiceninja
sudo apt install unzip sudo unzip invoiceninja.zip -d /var/www/invoiceninjaUbah izin dan kepemilikan
sudo chown -R www-data:www-data /var/www/invoiceninjasudo chmod -R 755 /var/www/invoiceninjaBuat database invoice ninja
sudo mysqlBuat database
create database invoiceninjaBuat user pengelola
create user namauser@localhost identified by 'password';Berikan izin kepada user untuk mengelola database
grant all privileges on invoiceninja.* to namauser@localhost;Flush
flush privileges;exit;Install PHP beserta modul yang diperlukan
(Invoice ninja v5 hanya dapat dijalankan dengan baik menggunakan php 8.0 atau diatasnya) by default ubuntu 20.04 hanya menyediakan paket PHP 7.4
sudo apt install software-properties-commonsudo add-apt-repository ppa:ondrej/php -ysudo apt install php-imagick php8.0 php8.0-mysql php8.0-fpm php8.0-common php8.0-bcmath php8.0-gd php8.0-curl php8.0-zip php8.0-xml php8.0-mbstring php8.0-bz2 php8.0-intl php8.0-gmpKonfigurasi Invoice Ninja
Beralih ke direktori invoice ninja
cd /var/www/invoiceninja/Salin file .env.example kedalam file bernama .env
sudo cp .env.example .envEdit konfigurasi
nano .envCari baris
APP_URL=http://localhostLalu ubah menjadi url domain/ip address dan protokol (http atau https) yang digunakan
Contoh: APP_URL=https://ninja.warscloud.com atau APP_URL=http://192.168.0.102
Ubah parameter database
DB_HOST=localhost
DB_DATABASE=invoiceninja
DB_USERNAME=namauser
DB_PASSWORD=password
DB_PORT=3306*Catatan: ika kata sandi Anda mengandung karakter khusus, Anda dapat menggunakan tanda kutip ganda seperti ini: DB_PASSWORD=”ninja_password”.
Save konfigurasi lalu keluar dengan menggunakan ctrl+x
Ubah kepemulikan file .env
sudo chown www-data:www-data /var/www/invoiceninja/.envSelanjutnya, jalankan perintah berikut untuk membuat kunci aplikasi unik untuk instalasi InvoiceNinja Anda
sudo php8.0 /var/www/invoiceninja/artisan key:generateMigrasi database (pada bagian ini membutuhkan waktu agak lama jika kamu menjalankan ubuntu didalam local/virtual box karena resource yang kecil)
sudo php8.0 /var/www/invoiceninja/artisan migrate:fresh --seedKonfigurasi server blok web server (Jika menggunakan domain)
sudo nano /etc/nginx/conf.d/invoiceninja.confMasukkan teks berikut ke dalam file. Ganti teks berwarna merah dengan data Anda yang sebenarnya. Jangan lupa untuk menetapkan catatan A untuk nama domain. (Perhatikan bahwa root web disetel ke /var/www/invoice-ninja/public/, bukan /var/www/invoice-ninja/)
server {
    listen   80;
    listen   [::]:80;
    server_name invoice.yourdomain.com;

    root /var/www/invoiceninja/public/;
    index index.php index.html index.htm;
    charset utf-8;
    client_max_body_size 20M;

    location / {
        try_files $uri $uri/ /index.php?$query_string;
    }

    if (!-e $request_filename) {
       rewrite ^(.+)$ /index.php?q= last;
    }

    location = /favicon.ico { access_log off; log_not_found off; }
    location = /robots.txt  { access_log off; log_not_found off; }

    access_log  /var/log/nginx/invoiceninja.access.log;
    error_log   /var/log/nginx/invoiceninja.error.log;

    location ~ \.php$ {
        fastcgi_split_path_info ^(.+\.php)(/.+)$;
        fastcgi_pass unix:/run/php/php8.0-fpm.sock;
        fastcgi_index index.php;
        include fastcgi_params;
        fastcgi_param SCRIPT_FILENAME $document_root$fastcgi_script_name;
        fastcgi_intercept_errors off;
        fastcgi_buffer_size 16k;
        fastcgi_buffers 4 16k;
    }

    location ~ /\.ht {
        deny all;
    }

    sendfile off;
}*Catatan: Sesuaikan baris text berwarna orange dengan versi php yang digunakan
Simpan dan tutup file. Kemudian uji konfigurasi Nginx
sudo nginx -tJika pengujian berhasil, muat ulang Nginx agar perubahan diterapkan
sudo systemctl reload nginxMengaktifkan https (Bila Diperlukan)
sudo apt install certbotJika Anda menggunakan Nginx, maka Anda juga perlu menginstal plugin Certbot Nginx
sudo apt install python3-certbot-nginxSelanjutnya, jalankan perintah berikut untuk mendapatkan dan menginstal sertifikat TLS.
sudo certbot --nginx --agree-tos --redirect --hsts --staple-ocsp --email [email protected] -d invoice.yourdomain.comKeterangan:
--nginx: Use the nginx plugin.--apache: Use the Apache plugin.--agree-tos: Agree to terms of service.--redirect: Force HTTPS by 301 redirect.--hsts: Add the Strict-Transport-Security header to every HTTP response. Forcing browser to always use TLS for the domain. Defends against SSL/TLS Stripping.--staple-ocsp: Enables OCSP Stapling. A valid OCSP response is stapled to the certificate that the server offers during TLS.
Selesaikan Instalasi dengan Setup Wizard
Buka invoice.yourdomain.com/setup menggunakan web browser untuk meluncurkan wizard penyiapan berbasis web.
Pertama, Anda perlu menetapkan URL untuk instalasi InvoiceNinja Anda (https://invoice.yourdomain.com) atau (http://IP-ADDRESS)
== ==
Troubleshoot
Jika Anda mengalami 500 server error saat menggunakan InvoiceNinja, silakan periksa log di bawah direktori /var/www/invocieninja/storage/logs/. Kemungkinan besar ini adalah masalah izin, yang dapat diperbaiki dengan:
sudo chown www-data:www-data /var/www/invoiceninja/storage/framework/cache/data/ -RSetup cronjob
Kami perlu menyiapkan Cron Job untuk mengirim faktur berulang dan pengingat email. Edit file crontab pengguna www-data. Jika Cron Job belum di konfigurasi maka akan muncul notifikasi seperti berikut
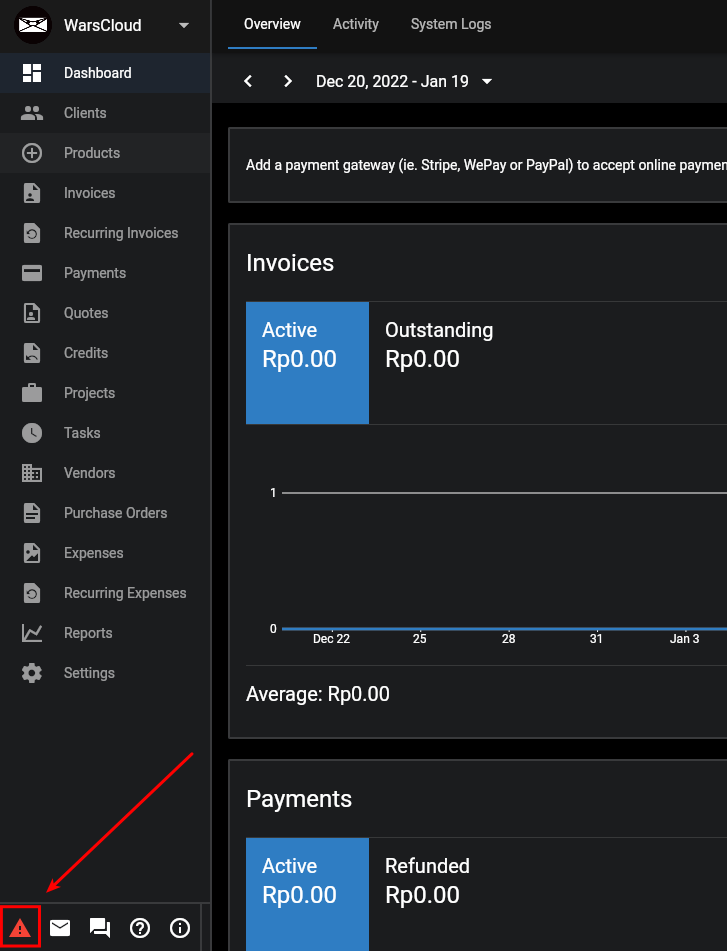
Konfigurasi Cronjob seperti berikut
sudo -u www-data crontab -eMasukkan baris berikut dipaling bawah
0 8 * * * /usr/bin/php8.0 /var/www/invoiceninja/artisan ninja:send-recurring > /dev/null
0 8 * * * /usr/bin/php8.0 /var/www/invoiceninja/artisan ninja:send-reminders > /dev/null
* * * * * /usr/bin/php8.0 /var/www/invoiceninja/artisan schedule:run >> /dev/null 2>&1
Simpan dan tutup file. Jalankan perintah berikut untuk menguji apakah pekerjaan Cron akan dijalankan tanpa kesalahan
sudo /usr/bin/php8.0 /var/www/invoiceninja/artisan schedule:runMengubah konfigurasi SMTP
Edit file .env yang berada didalam direktori invoice ninja
nano /var/www/invoiceninja/.envSesuaikan baris berikut dengan konfigurasi SMTP yang baru
MAIL_MAILER="smtp"
MAIL_HOST="hostname_of_smtp_server"
MAIL_PORT="587"
MAIL_USERNAME="[email protected]"
MAIL_PASSWORD="your_password"
MAIL_ENCRYPTION="tls"
MAIL_FROM_ADDRESS="[email protected]"
MAIL_FROM_NAME="Invoice"
Simpan dan tutup file. Kemudian bersihkan cache
sudo -u www-data /usr/bin/php8.0 /var/www/invoiceninja/artisan optimizeJika cache dihapus, Anda akan melihat pesan berikut di output perintah
Configuration cache cleared!
Configuration cached successfully!
Route cache cleared!
Routes cached successfully!
Files cached successfully!
Cara upgrade versi Invoice Ninja
Cara upgrade ada di link keterangan sumber/referensi dibawah
Keterangan
Sumber/referensi:
https://www.linuxbabe.com/ubuntu/install-invoiceninja-ubuntu-20-04-apache-nginx